
Welcome! This is the first entry in a five-part series in which I explore Visual Studio Mobile Center and how it can help simplify your development and testing of mobile apps. I’ll be covering the following topics in the series:
- Build Automation
- Crashes & Analytics
- Testing
- Distribution
- Push Notifications
Note that, since Mobile Center is technically still in preview mode, the information relayed here is subject to change. As always, check the documentation for the latest and greatest and keep an eye on the roadmap for official options on Mobile Center.
First, let’s take a look at getting a project set up in Mobile Center and configuring a few different types of builds for different development and testing scenarios. For this, let’s assume your source control follows a Git-like branching strategy and you’d like to cover the following scenarios:
- A feature branch or many feature branches that are only used by developer who want to ensure builds on each check in, but don’t necessarily need to be deployed to devices.
- A develop branch that only includes completed features, can be run on real devices (singed with a development certificate), and is automatically distributed to Alpha testers
- A master branch that only included completed features that have been validated by the Alpha Testers, runs on real devices (signed with a production-ready certificate) and is distributed to a broader group of testers and is a candidate for release in an enterprise of public app store
I have already configured a code-base to meet these requirements if you’re following along at home without having to set up a repository from scratch. You can find it here.
So! Let’s dive in to Mobile Center and set up our first project. Once, you’ve singed in at https://mobile.azure.com/login you’ll be presented with a landing page, where you can configure your first Organization or App. While not necessary, I recommend first creating an Organization to help organize and define an app ecosystem – such as a series of related Line of Business apps. This is also useful for grouping identical apps that run on different platforms together and being able to quickly filter by a certain intellectual property.

In my case, I am using Xamarin.Forms, so setting up an org helps group the platforms I’m supporting into a nice bucket. Now let’s add an app, providing some basic configuration info:
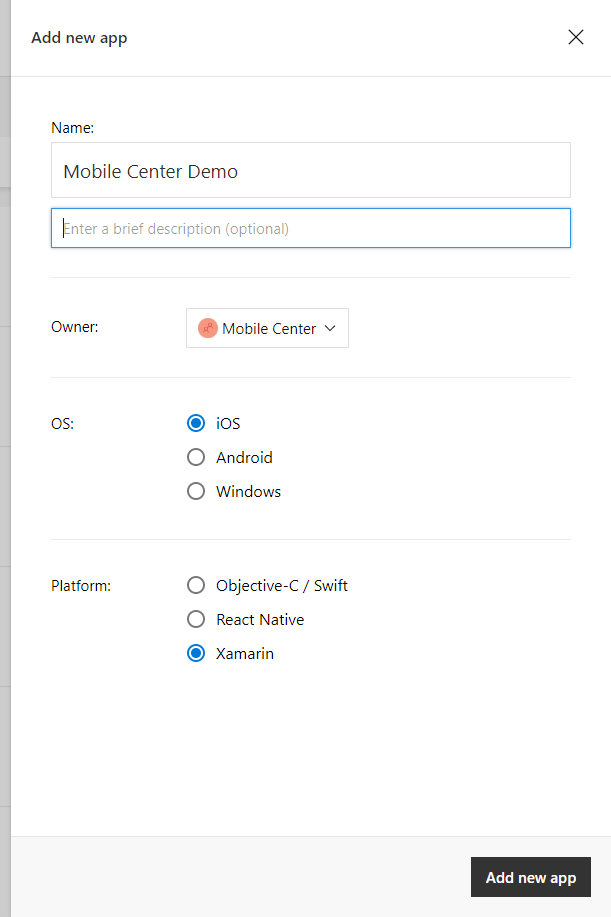
From here, we could go ahead and configure the SDK in our app, but we’ll look more at that in Part 2. Instead, tab over to the Build Section and we’ll connect a repository.
For now, there are three options to choose from: Visual Studio Team Services, GutHub, and Butbucket. Select the one that applies to your project and (if you haven’t done so previously) you’ll be prompted to log-in to that particular service. Unfortunately, this means you can only connect to one of each type of repository associated with your mobile center account; for example, if you have multiple GitHub identities, you will not be able to reference both from the same mobile center account. Once authenticated, you can connect whichever project you wish to build.
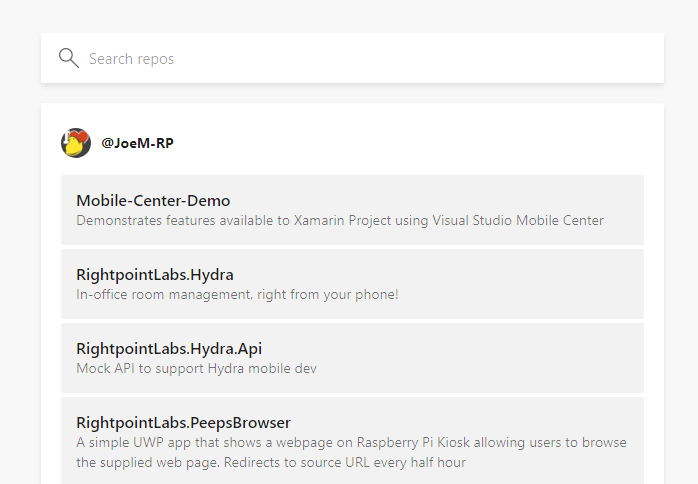
Once connected, you should see all available branches in that repository, yet un-configured to build. Things should be pretty straightforward from here, but let’s look at the available options once we pick a branch, given the considerations mentioned at the beginning of this post:
Build app
Here is where we set the project and configuration. For example, if you have many “Solutions” in a given repository, make sure you select the one that includes your mobile project only: I’ve run into issues when I included an Azure WebApi in a directory that I attempted to build with Mobile Center many a time. You’ll also need to select the configuration most appropriate for your branch. For example, a feature or develop branch is likely configured for a Debug or Ad-Hoc build respectively. You can also select the build type and frequency. As a habit, I have all my branches build on Push, but you may have good reason to only build when manually triggered. As for the build type, anything I do not intend to run on a “real device” (e.g – feature branches) I’ll default to simulator.
Sign builds
Signing builds is only required for non-debug, non-simulator builds. It’s best to ignore this section except for branches you intend to distribute in the interest of build times. You’ll need to provide the appropriate signing artifacts here when you are ready.
Test on a real device
Check this option if you want your build to run a test on a real device using Test Cloud once completed. For now, this “test” only verifies that the app launches, but you can configure more intense testing under the Test section, which we’ll discuss in a later post.
Distribute builds
Select this option if you want builds automatically distributed to groups of testers. Obviously, having a properly signed device build is a requirement for this feature, but once set-up you can signal which group should get the latest version as soon a build successfully completes. Note that you cannot distribute a single branch build to multiple groups automatically, so choose the one that is most appropriate for your branch.
Advanced
At the time of writing, Advanced only contains an option to create an SVG badge that represents the latest build status. Like so:
And that concludes Part 1 of the series! Check back soon for Part 2 where I’ll dive into Crash reporting and Analytics in Mobile Center

You must be logged in to post a comment.