
Welcome! This is the fourth entry in a five-part series in which I explore Visual Studio Mobile Center and how it can help simplify your development and testing of mobile apps. I’ll be covering the following topics in the series:
- Build Automation
- Crashes & Analytics
- Testing
- Distribution
- Push Notifications
Note that, since Mobile Center is technically still in preview mode, the information relayed here is subject to change. As always, check the documentation for the latest and greatest and keep an eye on the roadmap for official options on Mobile Center.
In this post, we’ll dive in to distribution methods available to us using Mobile Center. Let’s navigate to the distribution section from the Mobile Center dashboard and start by adding some new user groups and users. You’ll notice that anyone who is a collaborator for your app is already added to a default group, but let’s create one from scratch.
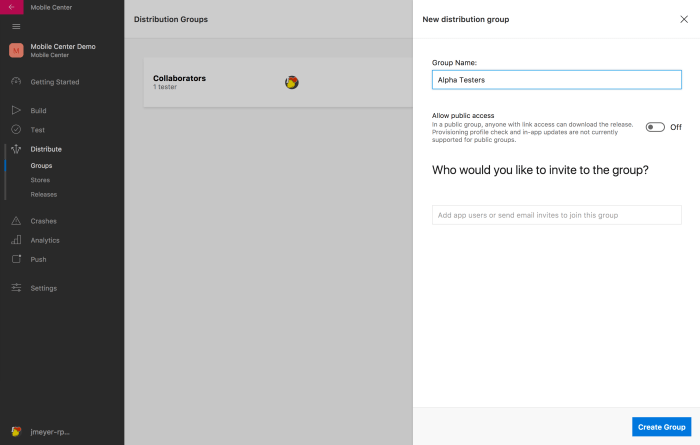
Fill out a name and pick a distribution method. Anyone added via email will receive an email invitation to download the app and start testing. You can also opt not to invite anyone specifically and instead Allow Public Access so that anyone with a link to the app can download. Once our new group is created, we can distribute an existing release from any branch configured to build for devices, or upload a app package manually.
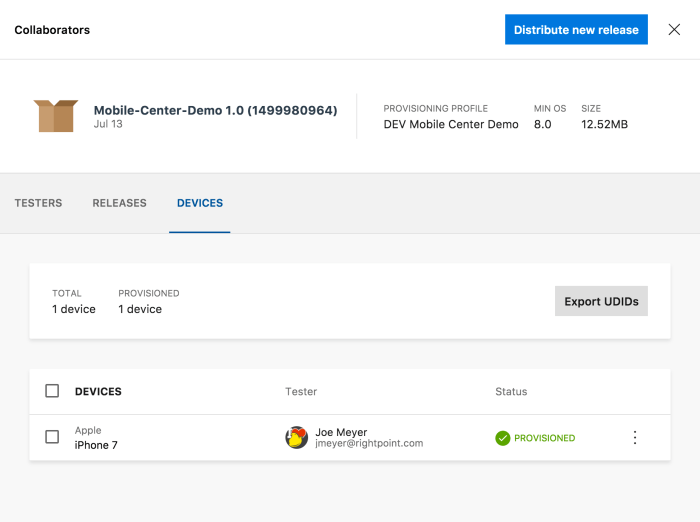
From this view, we can also browse and manage existing releases (if any) for this particular group from the Releases Tab, as well as view more granular device info from the Devices Tab (iOS Branches only). Here, we can also inspect and download UDIDs for any device registered to a tester that has downloaded the app and view the status of the device. This is most handy for Ad-Hoc releases, in which we may need to update the provisioning profile to included the UDID of a new tester in order for the app to function as expected for them.
For the complete view of all available releases, select the
Stores
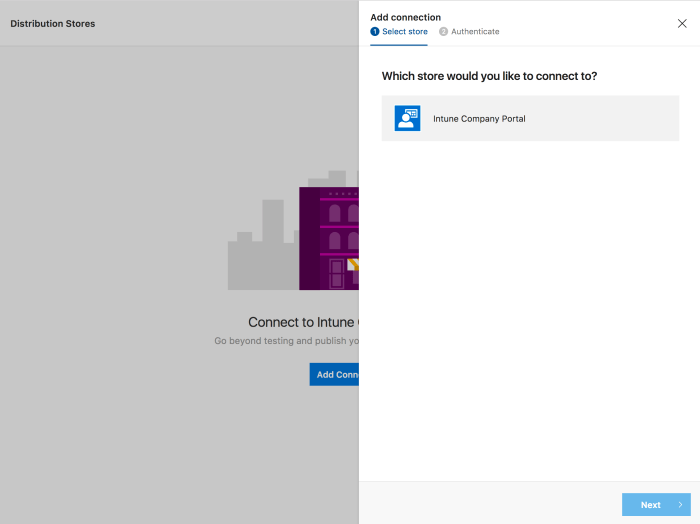
In some cases, it may make sense to distribute an app more broadly than what is currently available in Mobile Center. Just last week, the Mobile Center team introduced Stores to the Distribute dashboard. Right now, Microsoft’s Intune is the only platform supported, but it’s not hard to imagine more stores being added in the future, potentially closing the loop in the application development pipeline; once an app is appropriately tested and validated, simply release a build from a distribution branch to a production store to be consumed by general audiences. According to the product roadmap at the time of writing, both Apple Store distribution and Windows store distribution are on the horizon, so look for those features “soon”.
Distribution SDK
Once an app has been distributed to a group, anyone part of the distribution will receive an email notification informing them that a new version is available to download. The link provided in the email does not change, so anytime the link is visited on a mobile device, it will attempt to download and install the latest release available to that group.


Once the app is already on a phone, however, we can streamline the distribution process, using the Distribution SDK and thus circumvent the arduous Email > Link > Link > Dialogue > Download process, by providing testers with in-app updates as soon as they are available. Let’s start by opening App.xaml.cs and ensure we have added the Distribution SDK to our project and have initialized the feature with our other Mobile Center tools:
        protected override void OnStart()
        {
            // Handle when your app starts

            // Start Mobile Center
            MobileCenter.Start("ios=1f55e7a2-0958-4dc0-ba63-cd0cb9e62988;" +
                   "uwp=7740dc08-60a3-47f0-9eb2-c602815280ad;" +
                   "android=970c6dac-5e92-4fd7-bbd8-2017d2cb3709",
                               typeof(Analytics),
                               typeof(Crashes),
                               typeof(Distribute),
                               typeof(Push));

        }
For iOS, we’ll also need to open AppDelegate.cs and add a line to make sure Distribute isn’t called for debug builds:
			global::Xamarin.Forms.Forms.Init();
            Distribute.DontCheckForUpdatesInDebug();    // Must be called before "Load Application"
            LoadApplication(new App());
Let’s also take a moment to customize the “update available message”. Back ion App.xaml.cs, add the following line to the OnStart() method:
        protected override void OnStart()
        {
            // Handle when your app starts

            // Customize Distribute Message
            Distribute.ReleaseAvailable = OnReleaseAvailable;

            // Start Mobile Center
            MobileCenter.Start("ios=1f55e7a2-0958-4dc0-ba63-cd0cb9e62988;" +
                   "uwp=7740dc08-60a3-47f0-9eb2-c602815280ad;" +
                   "android=970c6dac-5e92-4fd7-bbd8-2017d2cb3709",
                               typeof(Analytics),
                               typeof(Crashes),
                               typeof(Distribute),
                               typeof(Push));

        }
Then, we create our OnReleaseAvailable method, like so:
        /// <summary>
        /// Source: https://docs.microsoft.com/en-us/mobile-center/sdk/distribute/xamarin
        /// </summary>

        private bool OnReleaseAvailable(ReleaseDetails releaseDetails)
        {
            // Look at releaseDetails public properties to get version information, release notes text or release notes URL
            string versionName = releaseDetails.ShortVersion;
            string versionCodeOrBuildNumber = releaseDetails.Version;
            string releaseNotes = releaseDetails.ReleaseNotes;
            Uri releaseNotesUrl = releaseDetails.ReleaseNotesUrl;

            // custom dialog
            var title = "Version " + versionName + " available!";
            Task answer;

            // On mandatory update, user cannot postpone
            if (releaseDetails.MandatoryUpdate)
            {
                answer = Current.MainPage.DisplayAlert(title, releaseNotes, "Download and Install");
            }
            else
            {
                answer = Current.MainPage.DisplayAlert(title, releaseNotes, "Download and Install", "Maybe tomorrow...");
            }
            answer.ContinueWith((task) =>
            {
                // If mandatory or if answer was positive
                if (releaseDetails.MandatoryUpdate || (task as Task<bool>).Result)
                {
                    // Notify SDK that user selected update
                    Distribute.NotifyUpdateAction(UpdateAction.Update);
                }
                else
                {
                    // Notify SDK that user selected postpone (for 1 day)
                    // Note that this method call is ignored by the SDK if the update is mandatory
                    Distribute.NotifyUpdateAction(UpdateAction.Postpone);
                }
            });

            // Return true if you are using your own dialog, false otherwise
            return true;
        }
Check in these changes to trigger a build and distribute this new release (if your branch doesn’t do so automatically). Note that, since the SDK has not been configured previously, testers will still need to download the app via the email to get the distribute feature; once they launch the app, they will be briefly redirected to a webpage to enable in-app updates.

From here on, anytime a new version is available Testers will be notified once the app launches with our custom dialogue:

Note that users will only be notified if the Build or Version number is higher than what is currently installed on their device. I tend to leverage the Build feature in Mobile Center that automatically increments the version number on each build, but if you may want to configure Build Number and Version Number manually – just be mindful of these values when you intend to release a new update.
With that, we conclude our tour of Mobile Center’s distribute features! Stay tuned for Part 5, in which we’ll explore Push Notifications through Mobile Center.

You must be logged in to post a comment.